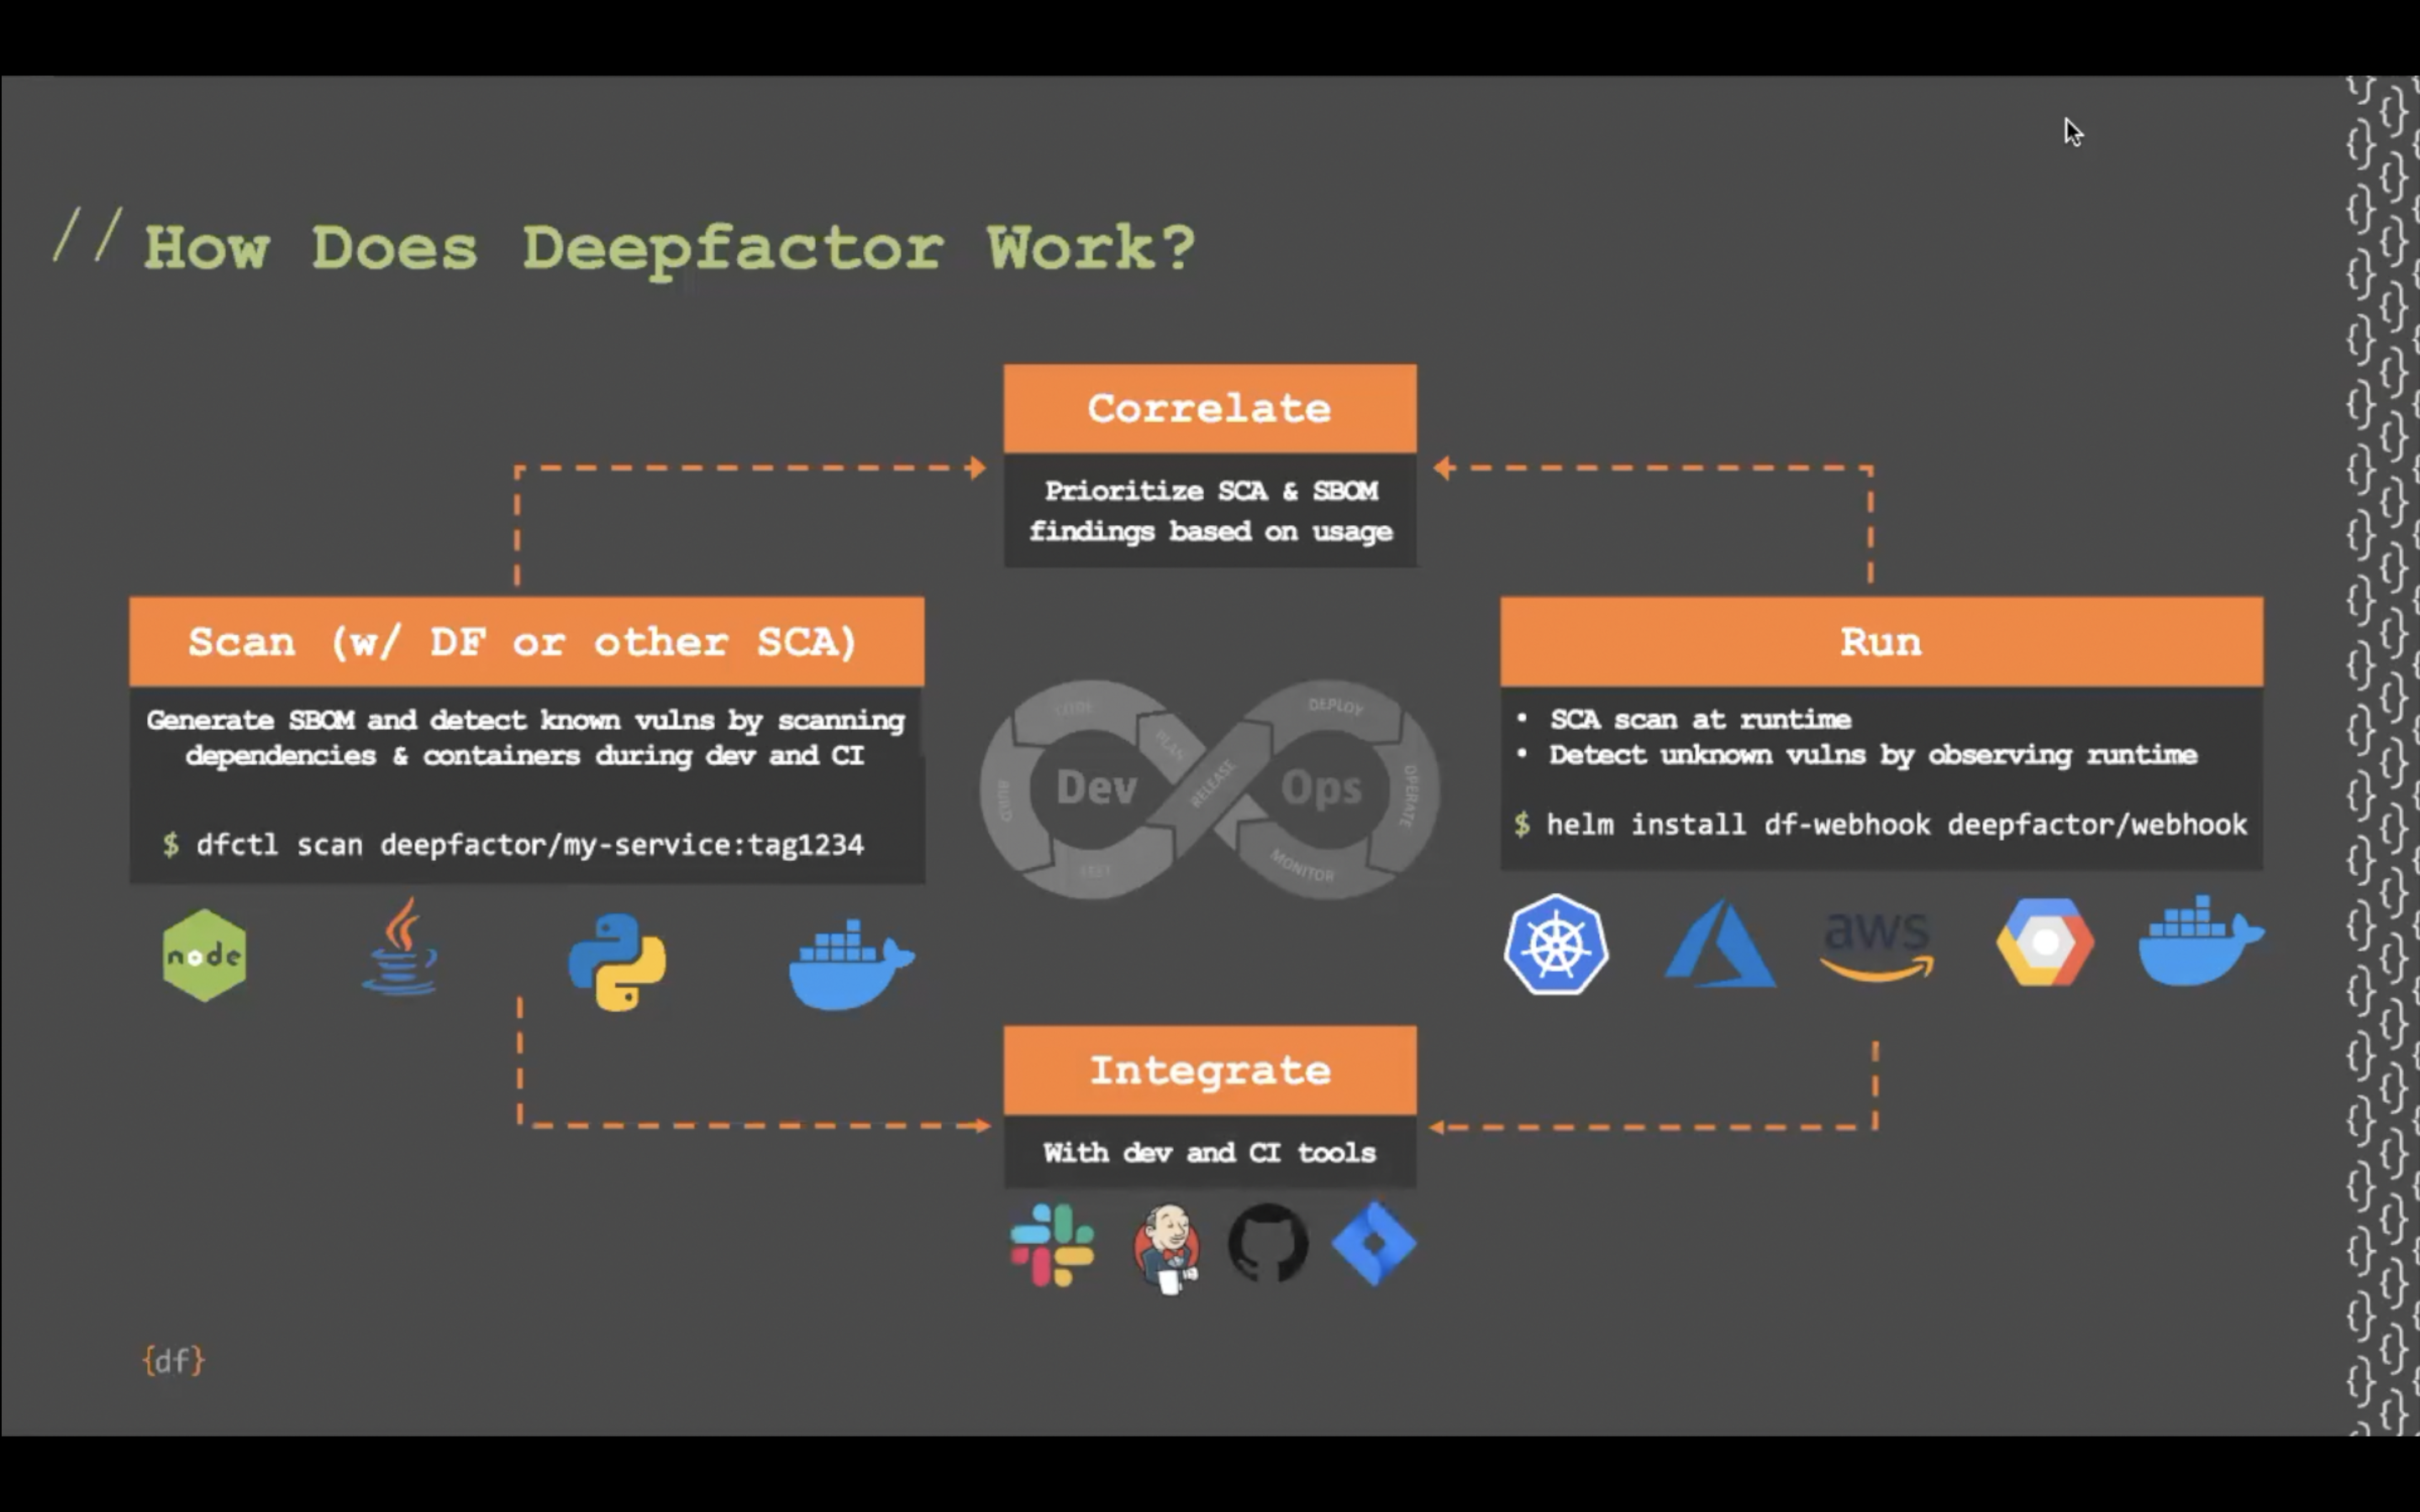
Deepfactor provides an AWS CloudFormation template to simplify the process of installing and provisioning the Deepfactor Portal on your AWS account.
Note: Before you start the deployment, check the prerequisites for AWS using CFT.
Supported Regions #
Deepfactor Portal can be installed in any of the following AWS regions:
us-west-1
us-west-2
us-east-1
us-east-2
ap-southeast-1
ap-northeast-1
eu-central-1
If your region is not listed above, please email us at: support@deepfactor.io.
Prerequisites #
Ensure you have the following prerequisites satisfied before you begin:
Prerequisites-for-installing-Deepfactor-Portal
Deployment Instructions #
This guide assumes the user has basic knowledge of AWS CloudFormation.
Please follow the steps below to install Deepfactor Portal:
Step 1: Create your Deepfactor account on my.deepfactor.io
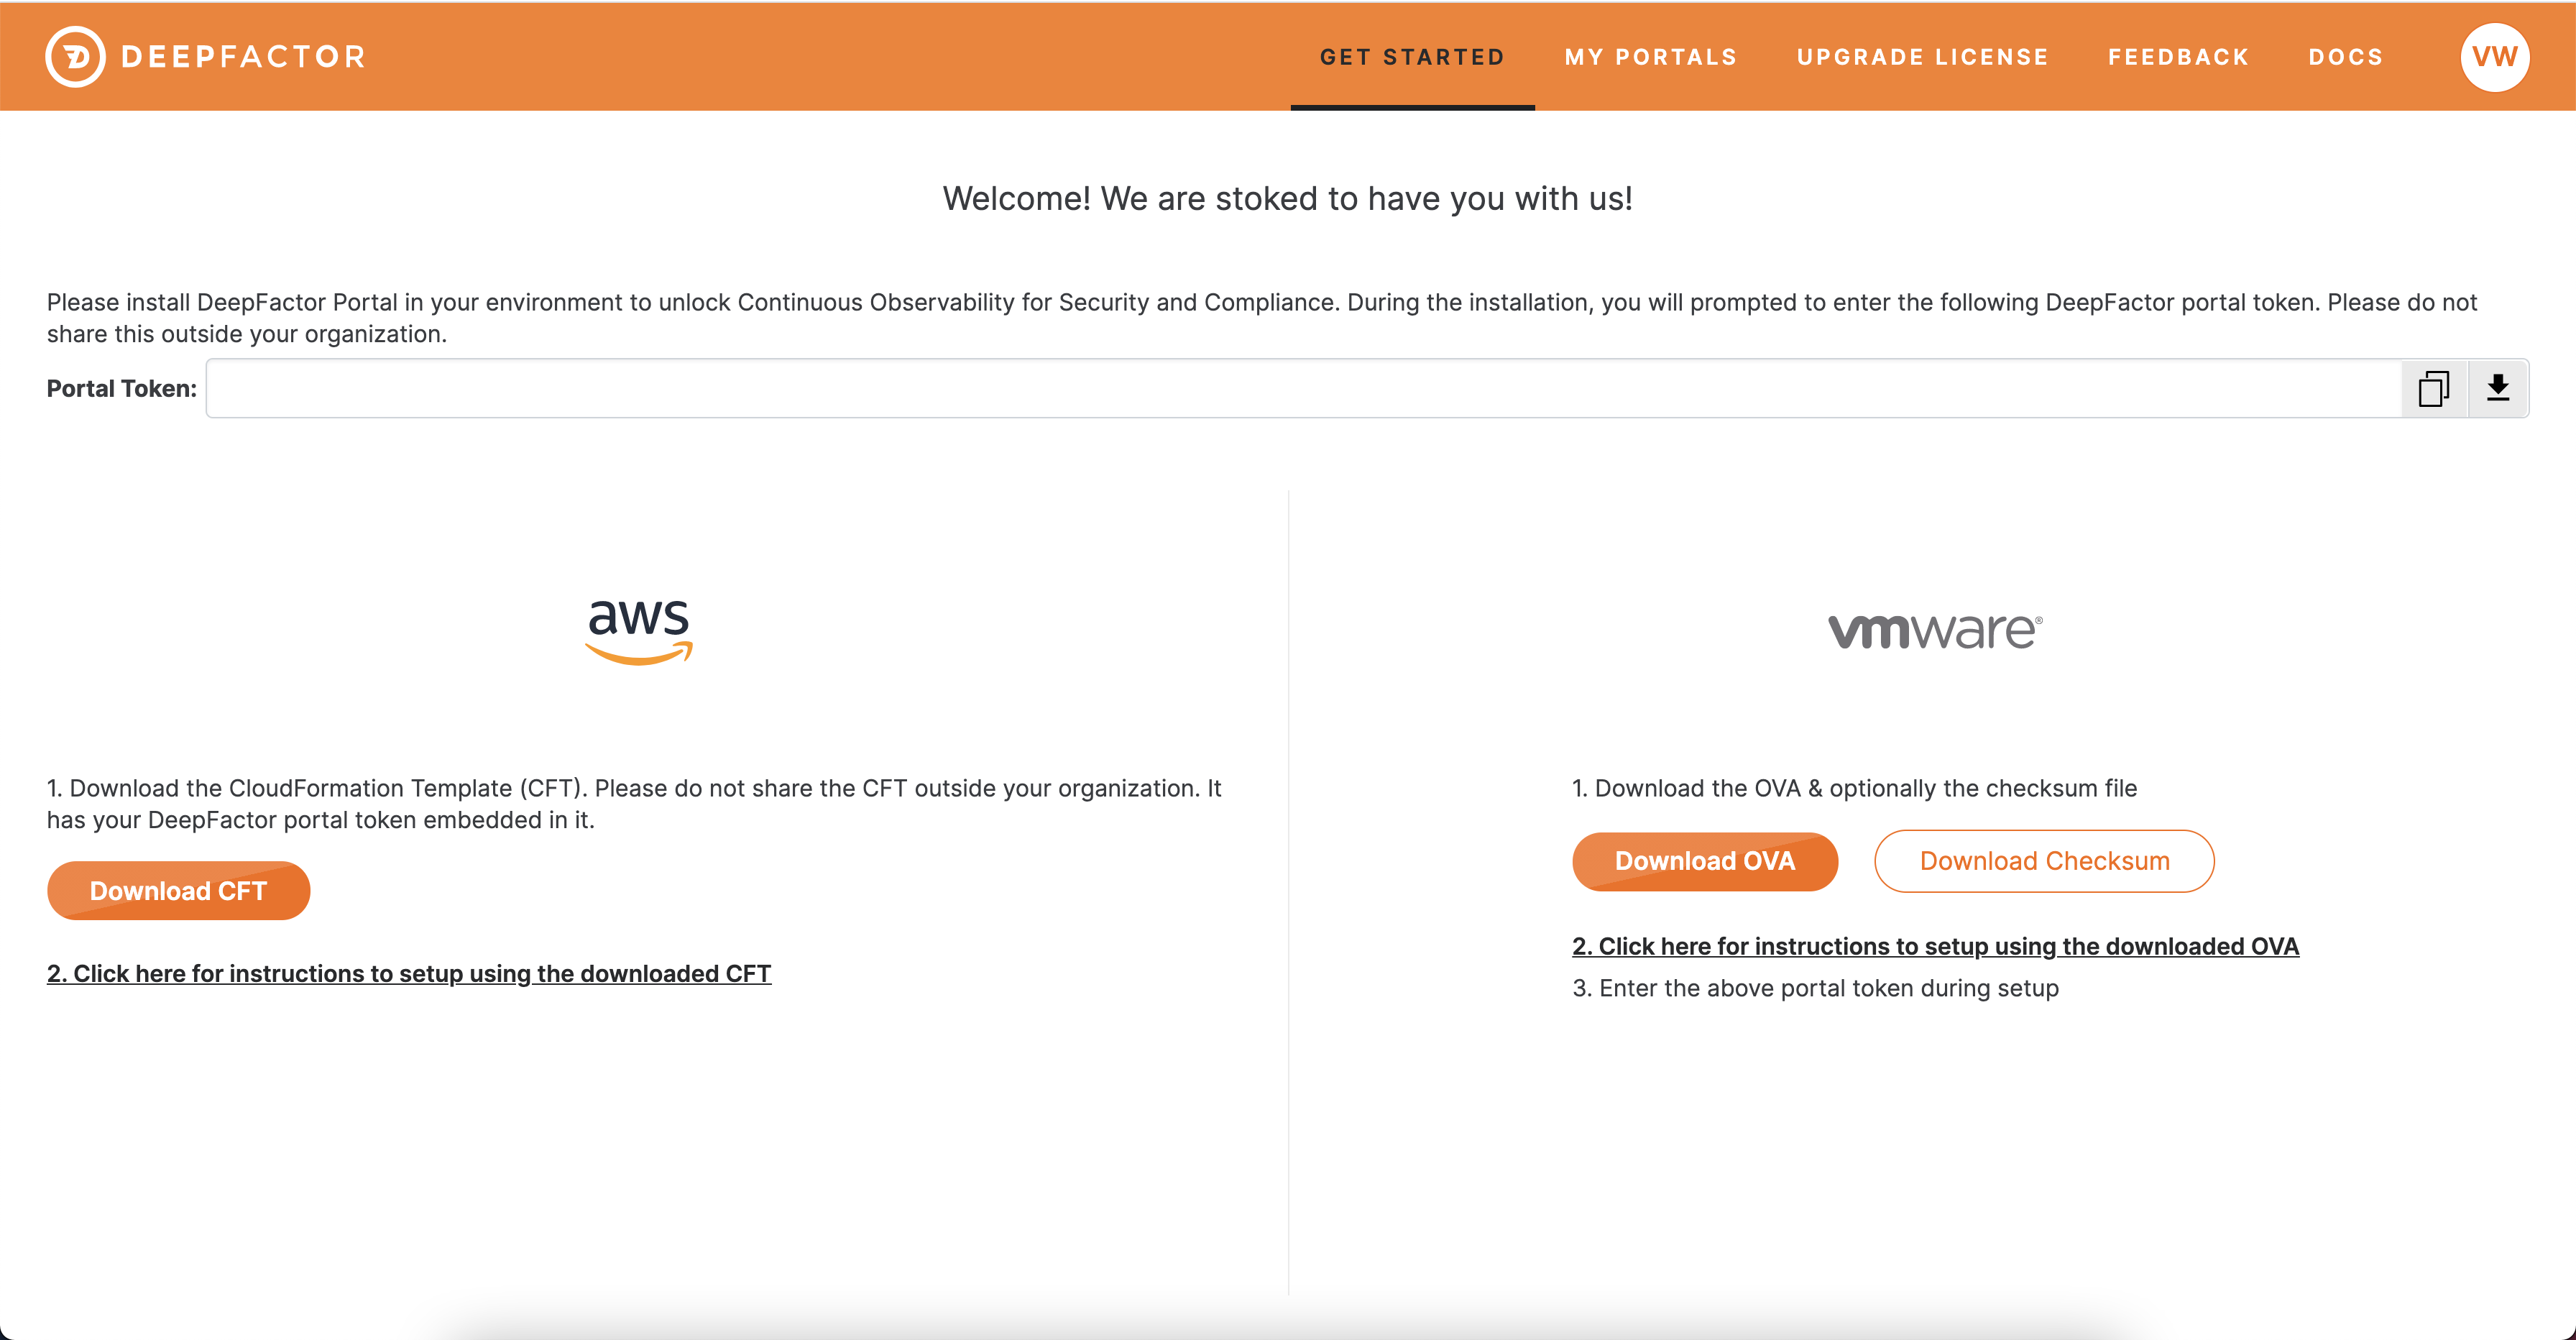
Step 2: Download the Deepfactor AWS CloudFormation template by clicking on the “Download CFT” button.
Step 3: Login to your AWS account and go to CloudFormation.
Step 4: Click on Create stack. In the “Specify Template” section, select “Upload a template file.”
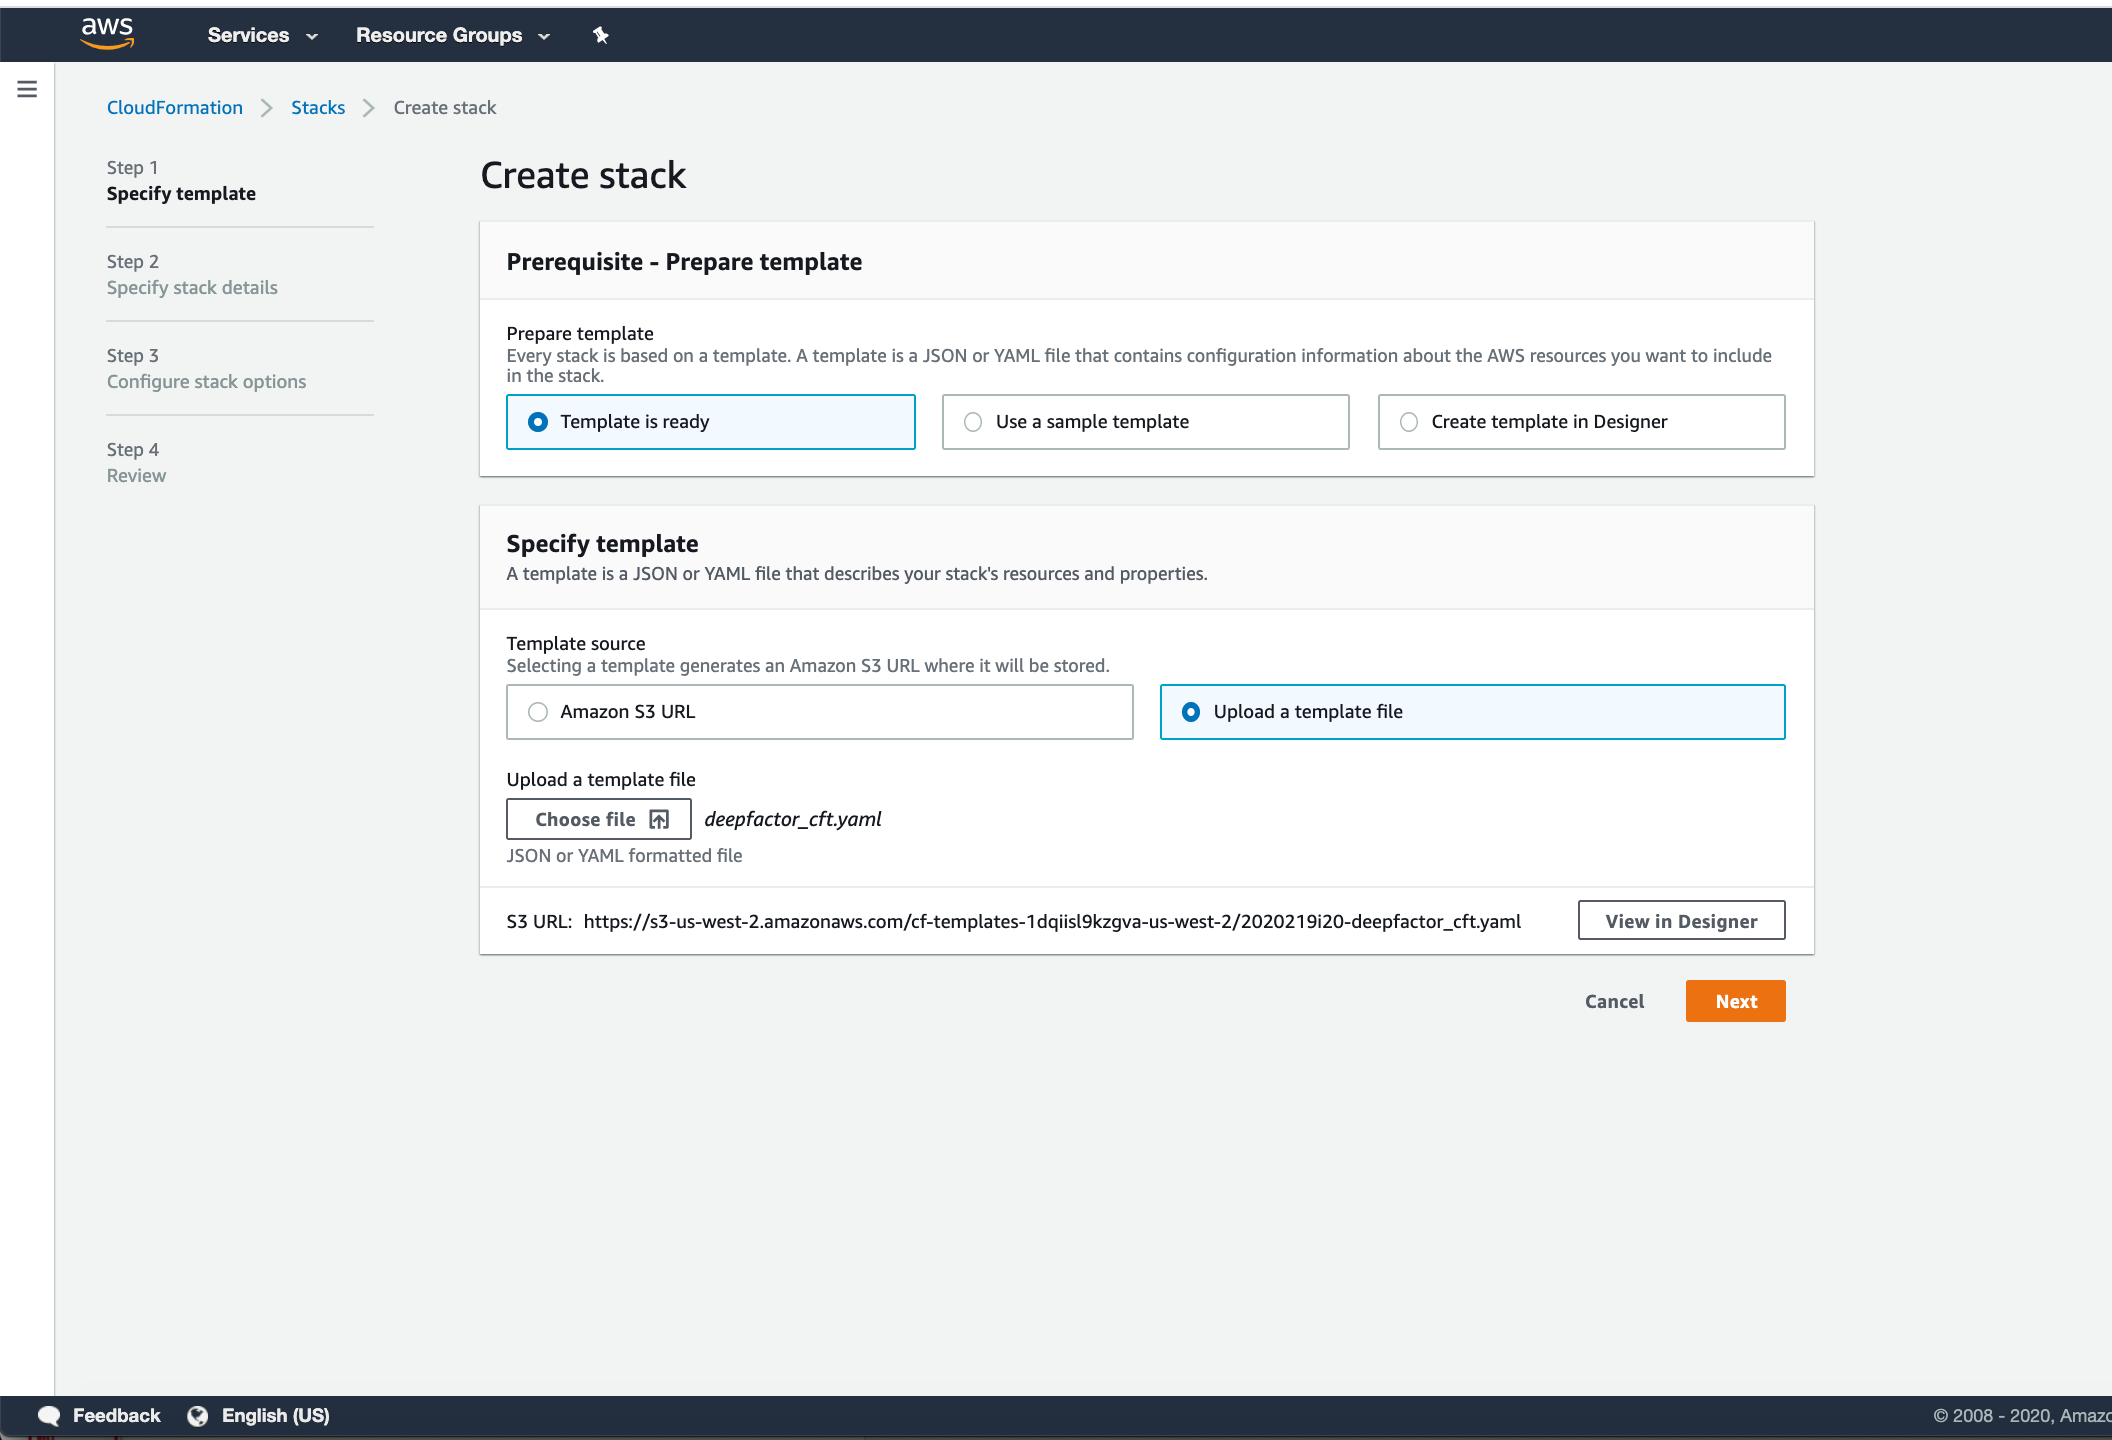
Step 5: Upload the CloudFormation Template downloaded from my.deepfactor.io.
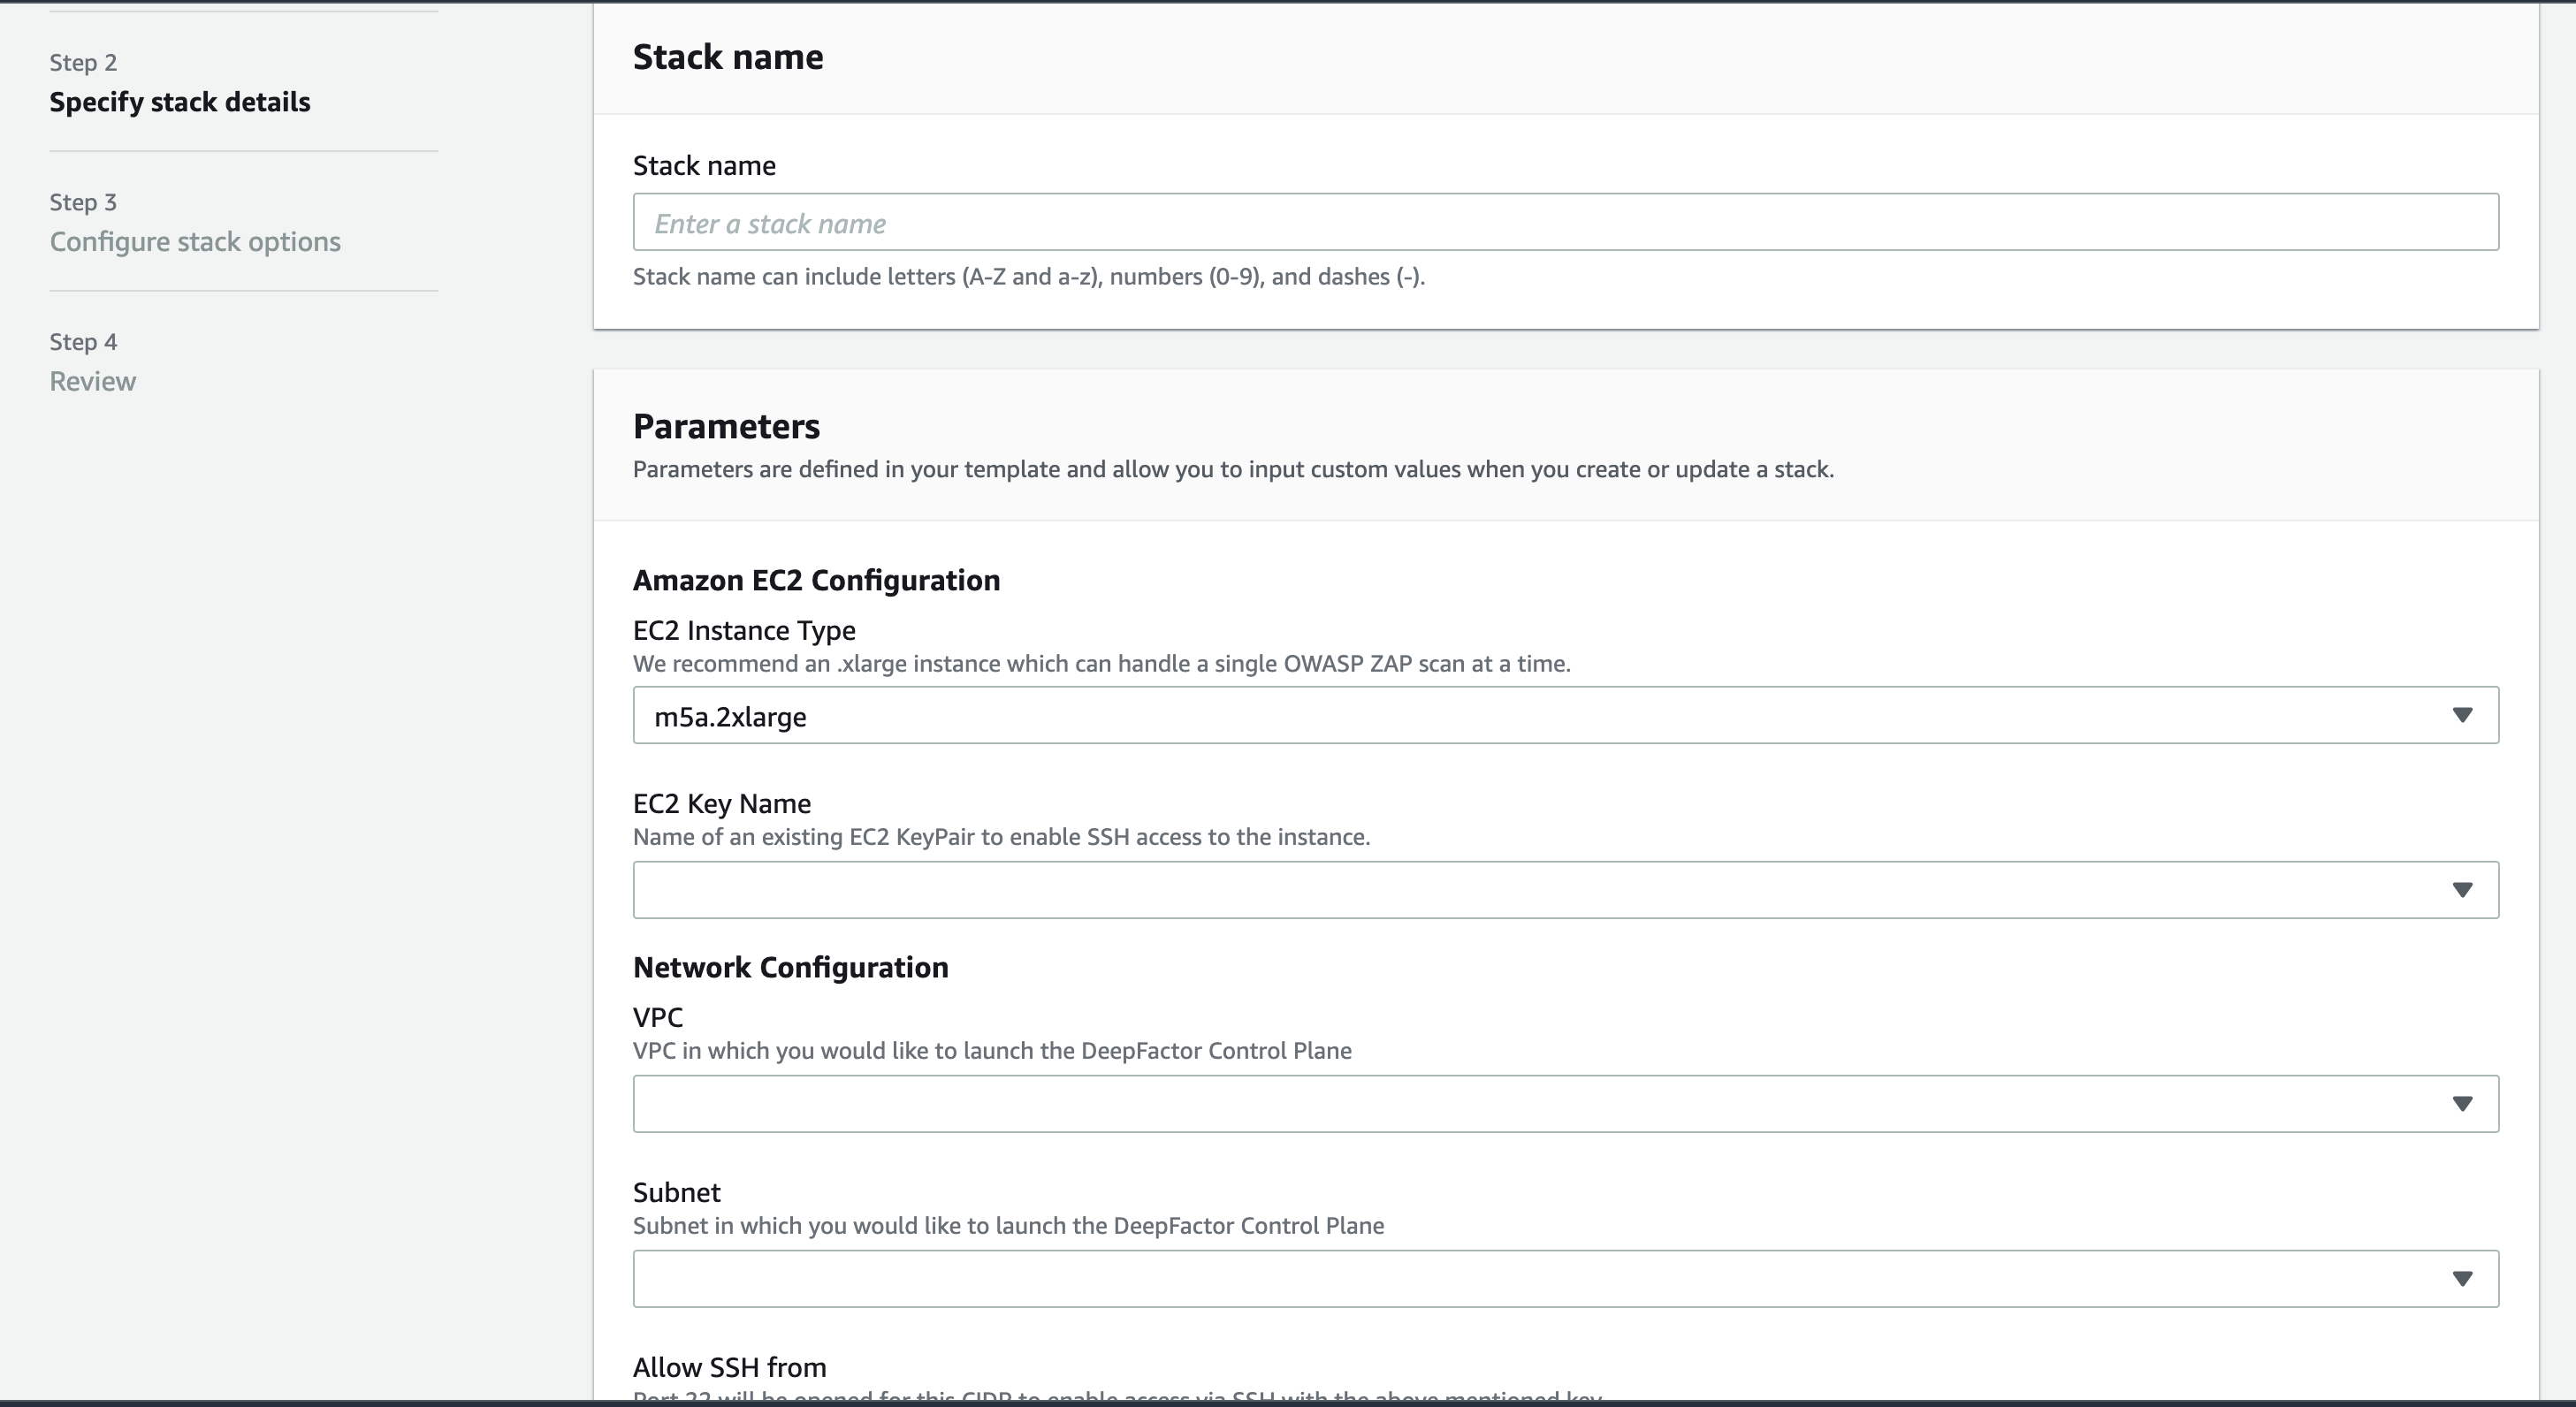
Step 6: In the “Specify Stack Details” step, enter a name for the stack and configuration details.
The config options are explained below
Amazon EC2 Configuration
- EC2 Instance Type: EC2 instance type of the node on which the Deepfactor portal should be installed.
- EC2 Key Name: SSH key pair. You will need this key pair (pem file) to ssh into the Deepfactor instance.
Network Configuration
- VPC: AWS virtual private cloud you want Deepfactor portal to be installed in.
- Subnet: Subnet you want the Deepfactor portal to be installed in. Please ensure you select a subnet in the selected VPC else stack creation will fail. A security group will be created in the specified VPC and the Deepfactor Portal EC2 instance will be created in the subnet you select.
- Allow SSH from: CIDR range from which you would like to SSH into the Deepfactor portal EC2 machine.
- Allow Deepfactor Telemetry from: CIDR range from which you would like to run your applications. Security groups would be created to allow these IP ranges to communicate with the Deepfactor portal over 443 and 13443 ports
- Portal Hostname (Optional): A valid FQDN (fully qualified domain name) for your Deepfactor Portal instance. If you do not enter the hostname, the default AWS public hostname will be used.
- Associate Elastic IP?: If you select yes, an elastic ip will be associated with the Deepfactor Portal Instance. Please note, if you select this option, your Deepfactor portal EC2 instance will have a public IP but only ports 443, 13443 and 22 would be exposed to the CIDR ranges you entered in the parameters section.
- Proxy URL (Optional): If this EC2 instance will be launched behind a proxy, please enter the full proxy URL (ex. http://10.1.1.16:3128). If not, please leave this parameter empty.
Deepfactor Portal Admin User
- First Name: Admin user’s first name.
- Last Name: Admin user’s last name.
- Email: Email address with which you will login to the Deepfactor portal.
- Password: Password of the admin user.
Note: Please remember the email and password. You will need them to login to the Deepfactor portal once the installation completes.
Container Images Registry Config (Optional)
If you want to pull Deepfactor container images from your internal registry, please fill this section else leave it blank.
- Internal Container Image Registry: Full url of your internal container registry. If you leave this field blank, container images will be pulled from Deepfactor’s public registry (public.ecr.aws/deepfactor/).
- DockerConfig: If the registry requires secrets to pull images, provide the docker config in base64 encoded format. If not, please leave this field blank.
Step 7: Click next and then create.
Step 8: CloudFormation will now start creating the stack. You can check the status of the stack creation in the “Events” section. It generally takes about 5 minutes for the AWS resources to be created and another 5-10 minutes for Deepfactor Portal to be setup on the AWS EC2 instance.
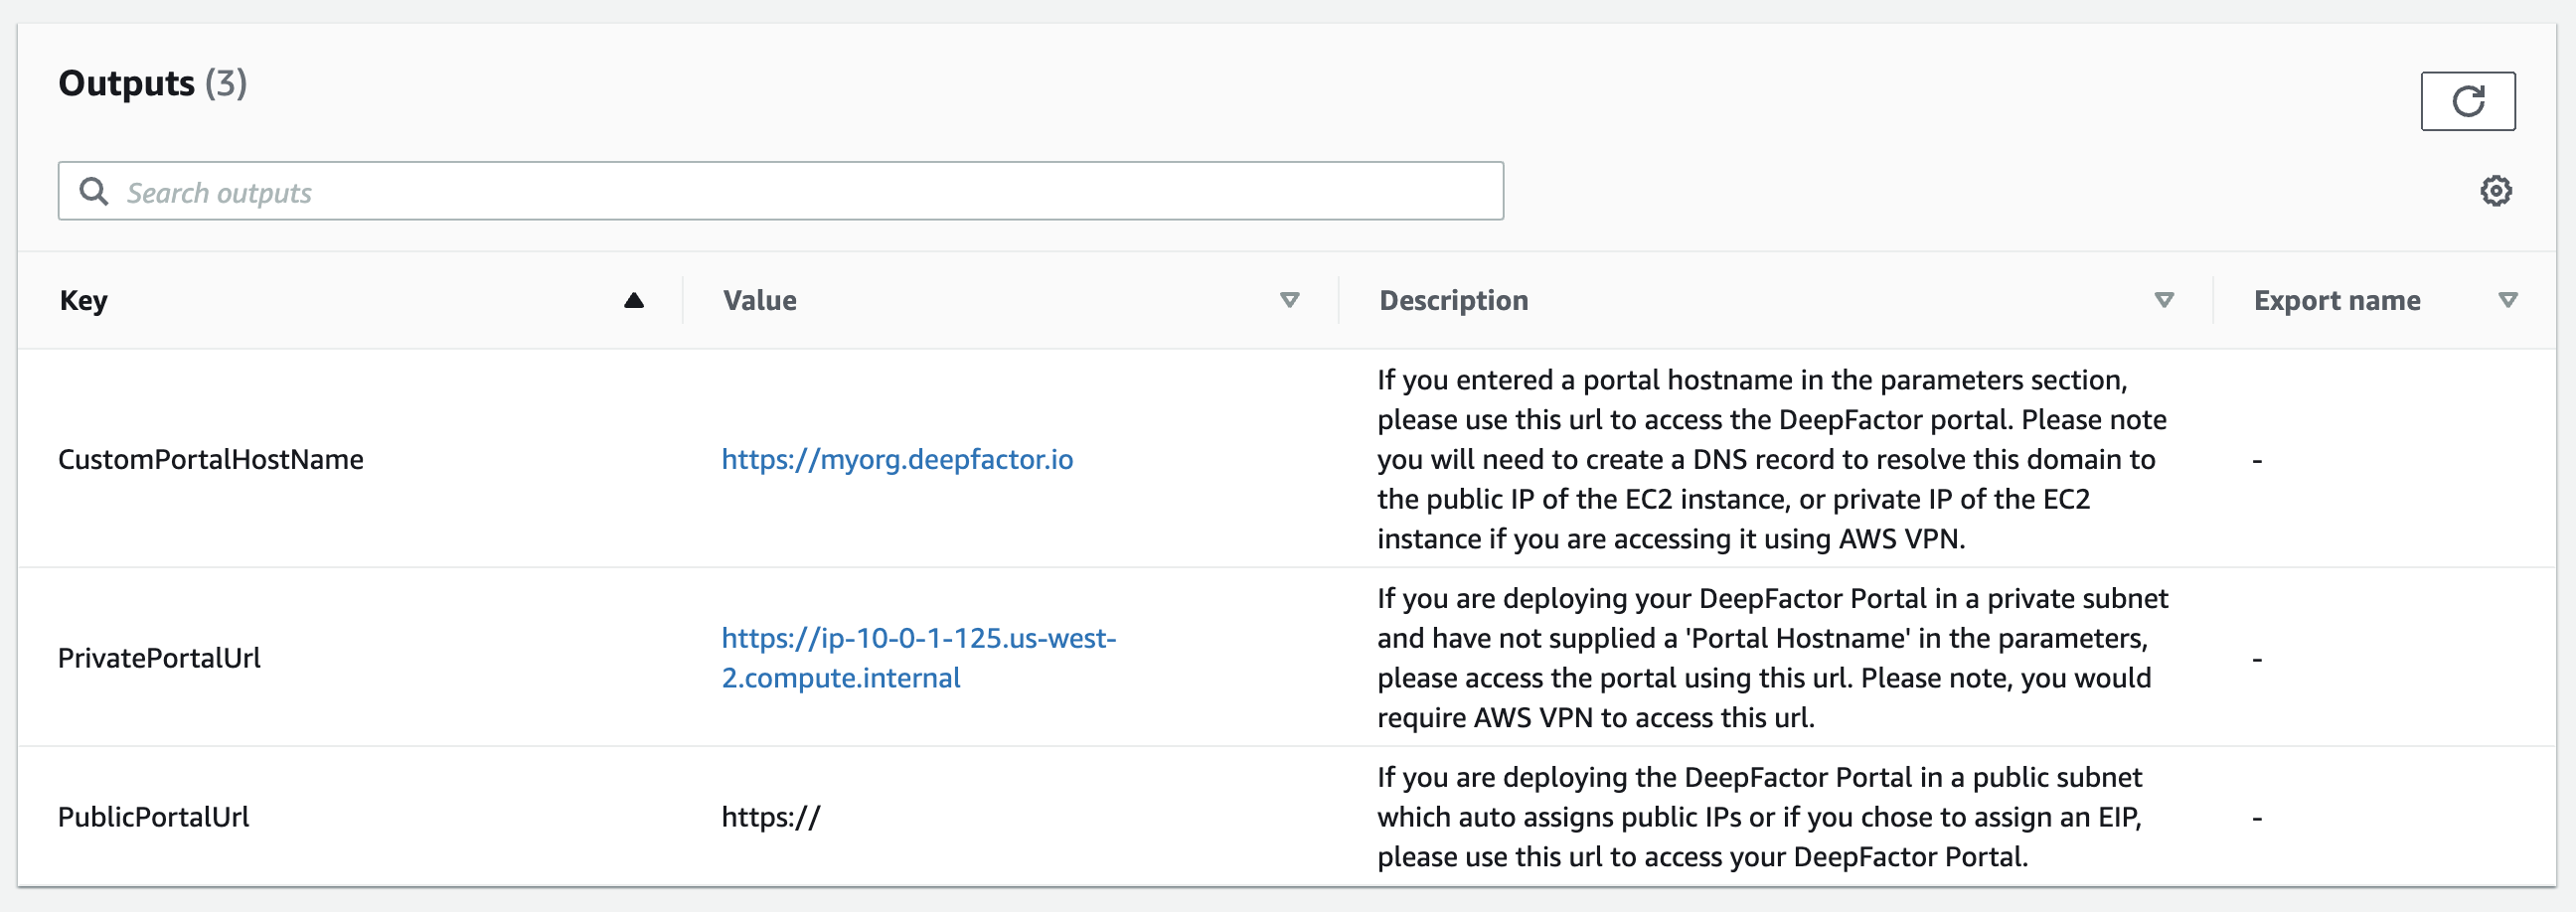
Step 9: Once the stack is created, go to the “Outputs” section. Here you will find the CustomPortalHostName, PublicPortalUrl and PrivatePortalUrl. Please check the following article to know which one to use to access the Deepfactor Portal in your network environment.
How to access Deepfactor Portal in different AWS subnet types.
Resources created in your AWS account #
The following resources will created after the CloudFormation stack is successfully created
1. DfControlPlane: An EC2 instance of the type you selected. We recommend the following EC2 instance types.
- m5a.2xlarge
- m5.2xlarge
- m4.2xlarge
- r5a.2xlarge
- r5.2xlarge
- r4.2xlarge
- c5.4xlarge
- c4.4xlarge
2. DfSecurityGroup: A security group with the following rules
Inbound rules
| Type | Protocol | Port | Source |
| SSH | TCP | 22 | Configurable |
| HTTPS | TCP | 443 | Configurable |
| Custom TCP | TCP | 13443 | Configurable |
Outbound rules
| Type | Protocol | Port | Destination |
| All traffic | All | All | 0.0.0.0/0 |
3. DfEIP (Optional): An Elastic IP that is assigned to DfControlPlane EC2 instance. This will be created only if you select ‘yes’ for ‘Associate Elastic IP?’ (AssignEIP) parameter.
Note: The CloudFormation stack creation might fail if you hit any AWS service quota limits. Please refer to the following AWS documentation article to understand AWS service limits.
Architecture Diagram #
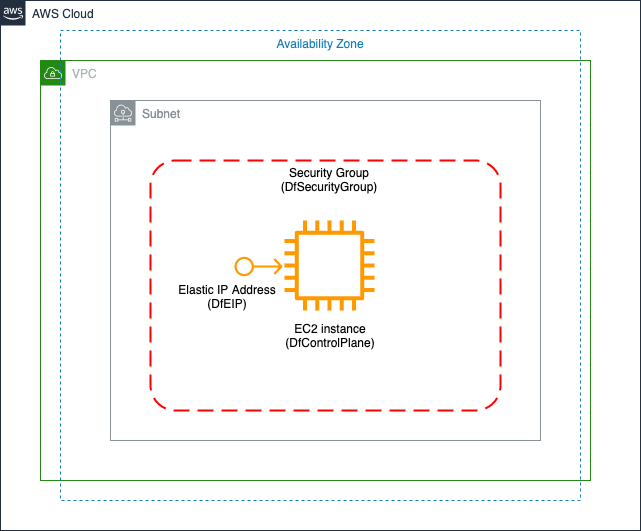
The following architecture diagram shows the resources created by the CFT. Please note, Elastic IP address is optional and will be created only if you select ‘yes’ for ‘Associate Elastic IP?’ in the parameters section.
Also, depending upon where your applications are running you can decide to deploy the Deepfactor portal in a public or private subnet. You can read more about how you can access the Deepfactor portal in different subnet types in the following article
How to access Deepfactor Portal in different AWS subnet types
Costs of resources #
1. DfControlPlane: EC2 instance pricing will depend on the instance size selected in the parameters section of the CFT. Please use the following link to know the pricing for the instance selected
https://aws.amazon.com/ec2/pricing/on-demand/
2. DfEIP (Optional): If you selected ‘yes’ for ‘Associate Elastic IP?’ in the parameters section, an Elastic IP (EIP) will be assigned to the Deepfactor Portal Instance. In such a case, the EIP cost will be incurred. To understand how EIP is charged by AWS, please refer to the following article
https://docs.aws.amazon.com/AWSEC2/latest/UserGuide/elastic-ip-addresses-eip.html#eip-pricing
3. Deepfactor license cost: In order to use the Deepfactor Portal, you will need an active Deepfactor On Premise license.
Please find the details of the Deepfactor licensing cost below:
https://www.deepfactor.io/pricing
Please reach out to us by clicking the contact us button to obtain a license.
Backup and Recovery #
We attach EBS volumes to the Deepfactor Portal EC2 machine. We recommend taking backups of the EBS volumes at regular intervals so you can use them in case of a failure.
