A webhook is a user-defined callback over HTTP. You can use Deepfactor webhooks to notify your app or web application such as an internal security dashboard or a vulnerability management system when certain events occur in Deepfactor. For example, you might want to notify your remote application when an alert is detected by Deepfactor. Using a webhook to do this means that your remote application doesn’t have to periodically poll Deepfactor (via the REST APIs) to determine whether any changes have occurred.
Adding a new webhook: #
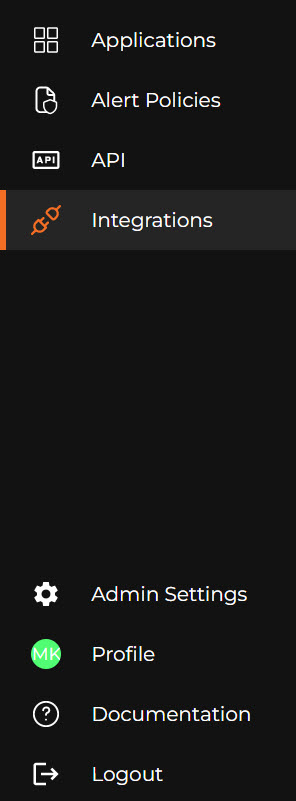
1. Click on “Admin Settings” from the header.
2. Navigate to “Integrations” from the left sidebar.
3. You will see the following screen:

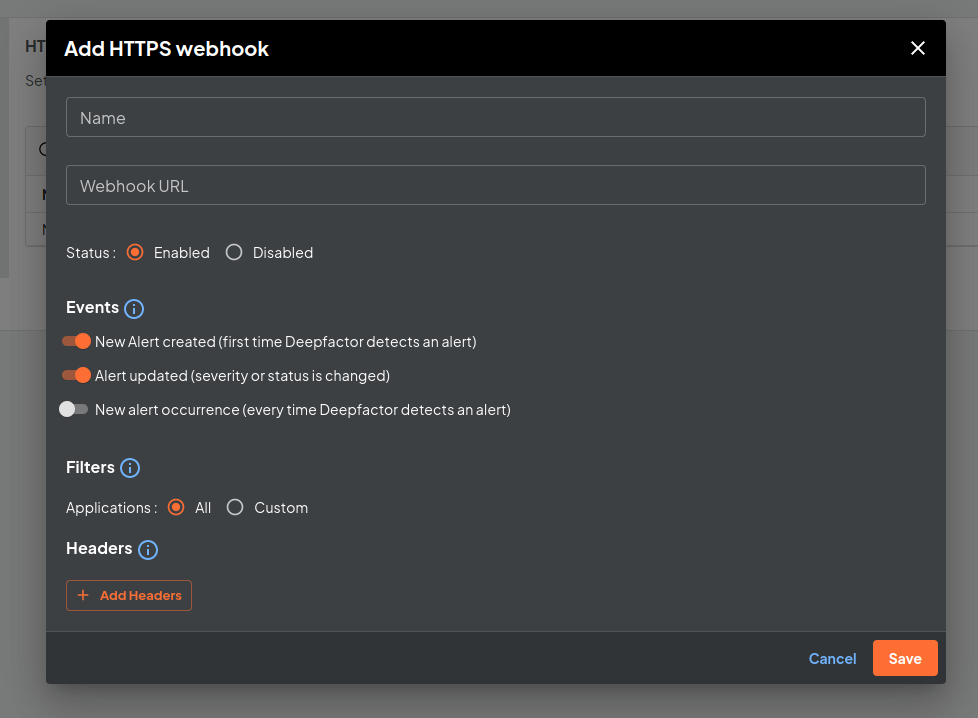
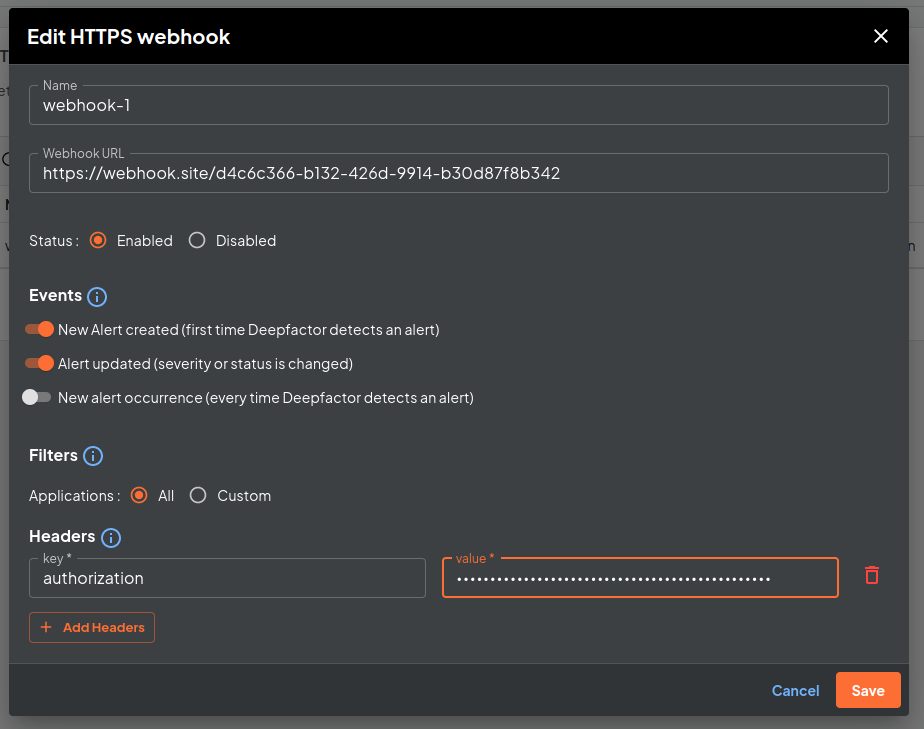
4. Click Add HTTPS Webhook. A new screen opens as shown below.
5. Enter the webhook Name.
6. Enter the webhook URL.
7. Select the Status (Enabled or Disabled).
8. Select the list of Events for this webhook.
9. Filters: You can select all applications or a subset of the applications.
10. Headers (Optional): Deepfactor can optionally store and send a maximum of five custom headers per HTTPS webhook. Please note, Deepfactor stores these headers in clear text and then sends them over in every HTTP webhook notification. If the receiver of the webhook notification expects an auth token, you can pass it in the header, possibly Authorization header.
11. Click Save.
Editing a webhook #
You can click on the edit button in the webhook row you want to edit. The following screen opens. Edit fields as required and Save.
Webhook delivery #
Webhooks are delivered asynchronously and do not block any automated or user operation. Also, firing of webhooks can be queued and delayed by a small duration if the system is under load.
Webhook failure handling #
If the HTTPS call fails, the failure is logged with timestamps in the pod logs. In addition, if webhook HTTP call fails 10 times in succession, the webhook is disabled and marked as failed. In failed state, the webhook HTTP URL will not be called even if the events of interest occur. You can edit webhooks in failed state and re-enable them after you have fixed the reason for failure.
